
Autoclave Sterilization Pouches & Chemical Indicators (Class 1 to Class 6): Clinical Compliance Guide
Complete clinical guide to ISO 11140-1 Chemical Indicators (Type 1 to Type 6), EN 868-5 medical peel pouches, biological spore testing (ISO 11138), and event-related sterile shelf life.
ZeruvMed Clinical Procurement Desk · Sterility Assurance & Infection Prevention Audit Group
ISO 11140-1 · EN 868-5 · ISO 11607-1 · CDC Sterilization Guidelines · Published 2026-02-18 · Reviewed & Updated 2026-10-15
Executive Summary · Procurement Brief
Key Clinical & Commercial Takeaways
- 1External color-change arrows printed on sterilization pouches are ISO 11140-1 Type 1 (Class 1) process indicators: they only verify that the pouch was exposed to heat/steam (~120°C for a few seconds), NOT that the instruments inside are sterile.
- 2True sterility assurance inside every surgical pack or cassette requires an internal Class 5 (Integrating Indicator, calibrated to biological spore kill across 121°C–135°C) or Class 6 (Emulating Indicator, cycle-specific to 134°C for 3.5 or 18 minutes).
- 3Medical-grade sterilization pouches must comply with EN 868-5 / ISO 11607-1, featuring 60–70 gsm wet-strength medical kraft paper (0.1–0.2 µm tortuous pore path) thermally triple-sealed to a multi-layer CPP/PET copolymer film.
- 4Writing directly on the paper side of a sterilization pouch with a ballpoint pen or non-validated marker perforates the microbial barrier and leaches solvent ink through the paper during steam condensation—always label on the plastic film flange outside the heat-seal seam.
Side-by-Side Specification Matrix
ISO 11140-1 Chemical Indicator Classification Matrix (Type 1 / Class 1 through Type 6 / Class 6)
| ISO 11140-1 Class / Type | Official Classification Name | Critical Variables Monitored | Clinical Placement & Compliance Role |
|---|---|---|---|
| Type 1 (Class 1) | Process Indicators | Single threshold exposure (presence of steam/heat or EtO gas) | Printed on pouch exterior or autoclave indicator tape; distinguishes processed vs unprocessed packs only |
| Type 2 (Class 2) | Indicators for Specific Tests | Air removal & dynamic steam penetration inside porous/hollow test challenges | Used inside daily Bowie-Dick porous test packs and 1.5m Helix PCD lumen challenge devices |
| Type 3 (Class 3) | Single-Variable Indicators | 1 critical variable at stated value (e.g., temperature reaching 134°C only) | Largely obsolete in modern CSSDs; does not verify holding time or steam saturation |
| Type 4 (Class 4) | Multi-Variable Indicators | 2 or more critical variables (typically Temperature + Time in presence of moisture) | Placed inside routine minor procedure pouches in Class S/B autoclaves (±25% tolerance) |
| Type 5 (Class 5) | Integrating Indicators (Integrators) | All 3 critical variables (Time, Temperature, Saturated Steam) correlated to ISO 11138 BI spores | Placed inside every surgical pack, implant tray, and cassette; matches Geobacillus kill curve (±15% tolerance) |
| Type 6 (Class 6) | Emulating Indicators (Cycle Verification) | All 3 critical variables for a specific cycle plateau (e.g., 134°C / 3.5 min or 134°C / 18 min Prion) | Highest precision (±6% temp / ±10% time tolerance); used for cycle-specific surgical tray release |
1. The Dangerous Fallacy of Relying on External Pouch Color Arrows
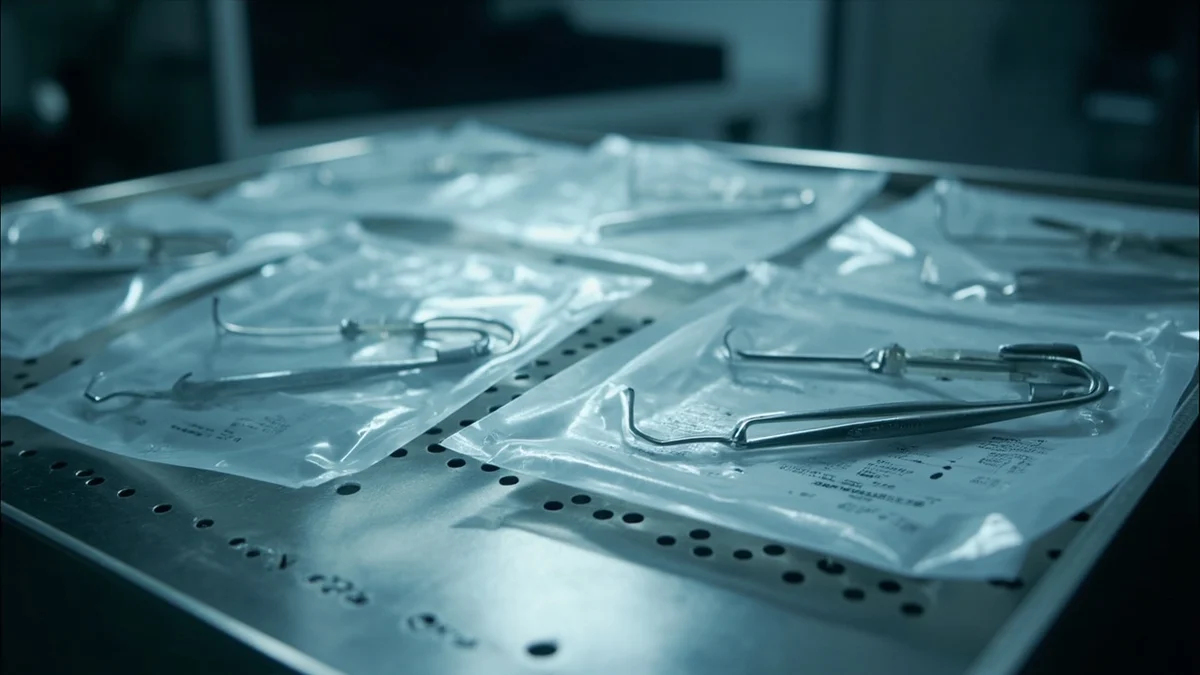
During clinical infection-control audits of dental practices and outpatient minor surgery centers, the single most common compliance violation is relying exclusively on the color-changing chemical chevrons printed on the edge of a self-seal sterilization pouch. Under ISO 11140-1, those printed ink marks are Type 1 (Class 1) Process Indicators. Their chemical formulation is designed to shift from blue or pink to brown/black within 30 to 60 seconds of contacting steam at 115°C–121°C.
Why is that distinction critical? Because Type 1 indicators exists solely to prevent a nurse or dental assistant from accidentally picking up an unautoclaved pack from the prep counter and mixing it with processed trays. If an autoclave suffers a solenoid failure after 90 seconds of heating, or if a trapped air bubble prevents the interior of a pouched hemostat from reaching 134°C for the full 3.5-minute hold, the external Class 1 arrow on the pouch will still turn dark brown! Only an internal Class 4, Class 5, or Class 6 chemical indicator strip placed inside the pouch alongside the instrument jaws verifies that sterilizing parameters penetrated the sterile barrier.
Maintaining rigorous infection control across both sterile packaging and clinician protective barriers—such as the antimicrobial scrubs and fluid-resistant lab coats in our /collections, /categories, and /products—forms the backbone of outpatient accreditation.
The Golden Rule of Pouch Loading (Paper-to-Plastic Orientation)
When loading sterilization pouches on slotted trays or racks inside a Class B autoclave, always orient pouches on edge (vertically) in a Paper-to-Plastic sequence, or flat with the paper side facing up and plastic facing down, with ZERO overlapping. Stacking paper-to-film flat compresses the pores under wet weight and traps condensate droplets.
2. Inside the Pack: Class 4 Multi-Variable vs Class 5 Integrators vs Class 6 Emulators
To achieve verifiable sterility assurance inside each pouch or wrapped surgical cassette, ISO 11140-1 defines three internal indicator tiers with progressively tighter tolerances:
Class 4 (Multi-Variable Indicators) react to two or more critical steam sterilization variables—typically time and temperature—using lead-free thermochromic ink. While adequate for routine diagnostic mirrors and unwrapped/simple trays, Class 4 strips have a wider tolerance band (±25% on time) and can occasionally reach their endpoint color slightly before full biological spore lethality if dry superheated steam is present.
Class 5 (Integrating Indicators) represent the hospital CSSD benchmark. Rather than relying solely on ink color shift, a Class 5 moving-front integrator uses a precision chemical pellet that melts and wicks along a paper track only when exposed to the integrated combination of Saturated Steam, Temperature, and Time across 121°C to 135°C. Its response curve is mathematically correlated to the thermal death time (D-value and z-value) of Geobacillus stearothermophilus endospores under ISO 11138-3. Class 6 (Emulating Indicators) go one step further: they are calibrated to a single specific cycle (such as 134°C for 3.5 minutes) and will NOT trigger until 94% of that exact cycle hold time has elapsed.
3. Engineering of EN 868-5 / ISO 11607-1 Medical Peel Pouches
Not all sterilization pouches sold in medical markets meet EN 868-5 and ISO 11607-1 barrier requirements. A compliant pouch is an asymmetric semi-permeable membrane engineered to let air out and pressurized steam in during the 134°C autoclave cycle, then snap shut its microscopic fiber matrix during vacuum drying to block bacteria, dust, and viral aerosols for up to 6 months.
- 60 to 70 gsm Medical-Grade Virgin Kraft Paper: Free of recycled fibers, chlorine bleach, and optical brighteners; engineered with a tortuous labyrinth pore structure (<0.25 µm effective microbial barrier) and high wet burst strength (>100 kPa).
- Multi-Layer Co-Extruded PET/CPP Transparent Film: 12 µm Polyester (PET) outer layer laminated to 38–40 µm Cast Polypropylene (CPP) inner contact layer that resists delamination at 138°C and allows fiber-free peel opening.
- Triple-Track Ribbed Heat Seal (≥8 mm Total Width): Three parallel thermal weld ribs prevent micro-channeling along the lateral margins and provide visual confirmation of seal continuity across the entire width.
- Lead-Free Dual Water-Based Process Indicators: Non-toxic ISO 11140-1 Type 1 indicators for Steam (Blue → Dark Brown/Black) and Ethylene Oxide (Pink → Yellow) printed outside the instrument contact zone.
4. Self-Seal Pouches vs Flat/Gusseted Heat-Seal Tubing Rolls
Outpatient clinics choose between pre-cut Self-Seal Pouches (with a pre-folded adhesive strip) and Heat-Seal Flat or Gusseted Reels cut to length and sealed with an impulse or rotary thermal sealer (at 175°C–185°C with a minimum 8–12 mm seal seam). Self-seal pouches require zero capital equipment and work well for low-volume practices, provided the operator folds strictly along the pre-scored perforation line and presses the adhesive firmly from the center outward to eliminate air channels at the corners.
However, for clinics processing more than 25 packs per day or bulky hinged cassettes, a validated rotary heat sealer with EN 868-5 flat and gusseted rolls reduces packaging material cost by 38% to 45% and eliminates the #1 cause of pouch barrier failure: half-folded self-seal flaps that pop open under -0.80 bar Class B vacuum pulses.
5. Biological Indicators (BI): Weekly Geobacillus Spore Verification
While Class 5 and Class 6 chemical indicators verify physical and chemical cycle conditions inside every pack, CDC, ADA, and AAMI ST79 guidelines mandate weekly Biological Indicator (BI) spore testing—plus a mandatory BI in every load containing an implantable device (such as orthopedic screws or titanium dental implants).
Steam autoclaves are challenged using self-contained vials containing at least 1 × 10^5 to 1 × 10^6 viable spores of Geobacillus stearothermophilus—the most thermoresistant non-pathogenic organism known to medical science. After running the test vial inside a challenging pouch at the coolest location of the autoclave chamber (above the drain near the door), the vial is crushed and incubated at 56°C–60°C alongside an unautoclaved positive control vial. Modern rapid fluorescence readers confirm spore enzyme inactivation in 20 to 60 minutes, whereas conventional colorimetric media vials verify zero bacterial growth (remaining purple rather than turning yellow) at 24 hours.
6. Event-Related vs Time-Related Shelf Life & Clinic Audit Protocol
Once a pouched instrument emerges completely dry from a Class B autoclave, how long does it remain sterile? Under EN 868-5 and hospital accreditation rules, single-pouched instruments stored in open shelving retain validated sterility for 30 to 90 days, single-pouched instruments stored inside closed, dust-free drawers/cabinets at 18°C–24°C and <60% relative humidity remain sterile for 180 days (6 months), and double-pouched instruments (properly sized inner pouch inside a larger outer pouch, paper-to-paper, plastic-to-plastic) maintain sterility for up to 365 days.
Always protect sharp instrument tips (Iris scissors, scalpel blades, dental explorers, and periosteal elevators) with perforated silicone tip guards before inserting them into a pouch so tips cannot puncture the CPP film under vacuum contraction, and leave 25% free headspace around the instrument. Equip your sterilization and surgery teams with barrier garments from /collections, explore /categories and /products (including the Pearl White Scrub Set and Women's Classic White Lab Coat), and complete your clinic order at /checkout.
For complete medico-legal traceability in dental implantology and outpatient minor surgery, clinics should implement a three-part peel-off batch label on every sterilization pouch recording the autoclave machine ID, cycle number, sterilization date, expiration date, and technician initials—transferring the adhesive sticker directly into the patient clinical chart at the moment the sterile barrier is opened.
Direct Storefront Integration
Recommended Clinical Workwear & Institutional Ordering
Standardize staff barrier protection and clinical uniforms alongside your biomedical equipment procurement.
View Clinical Apparel Collections
Shop infection-control clinical scrubs and lab coats for dental and minor surgery suites.
Browse All Categories
Explore Women, Men, Lab Coats, and Premium clinical apparel categories.
Complete Product Catalog
Review all ZeruvMed clinical scrubs and white barrier coats.
Pearl White Scrub Set
Crisp clinical white scrub set engineered for dental, dermatology, and CSSD professionals.
Order via Clinic Checkout
Fast institutional and clinic checkout with nationwide delivery across Pakistan.
Clinical Audit & Purchasing Q&A
Frequently Asked Questions
When double-pouching a surgical instrument, how should the inner and outer pouches be oriented?
When double-pouching, the inner pouch must be oriented Paper-to-Paper and Plastic-to-Plastic inside the outer pouch (never paper against plastic). Steam and air can only pass through the porous medical paper backing; if the inner pouch paper faces the impermeable outer plastic film, air evacuation and steam penetration are blocked.
Why did my sterilization pouches come out wet or burst open after the autoclave cycle?
Wet pouches occur when pouches are stacked flat on top of each other, overloaded beyond the autoclave's weight rating, removed before the post-vacuum drying cycle finishes, or run in a Class N non-vacuum sterilizer. Burst seals occur when insufficient headspace (<2.5 cm) is left at the seal margins or when the heat sealer temperature is set below 170°C.
Can I write the sterilization date and instrument name on the paper side of the pouch?
Never write on the porous paper side of a sterilization pouch, and never use a ballpoint pen on either side. Ballpoint tips create microscopic perforations in the barrier, and solvent inks wick through the paper during steam condensation to contaminate the surgical instrument. Write only on the plastic film flange outside the heat-seal seam using an ISO 11140 compliant autoclave marker.
Should instruments with ratchets (like hemostats and needle holders) be locked closed inside a pouch?
No. All hinged instruments with box locks and ratchets must be pouched in the unlocked (open) position, or held slightly ajar on an instrument stringer/pin. Locking a hemostat to the second or third ratchet tooth during autoclaving traps air between the overlapping serrations (blocking steam contact) and induces tensile stress cracking in the AISI 420 box lock.
What is the difference between a Class 5 Integrating Indicator and a Biological Spore Test?
A Biological Indicator (BI) contains live bacterial spores (Geobacillus stearothermophilus) that require incubation after the cycle to confirm biological death. A Class 5 Integrating Indicator contains no live organisms; it uses a physical-chemical moving front calibrated to match the BI death curve across 121°C–135°C, allowing immediate visual verification at the moment the tray is opened.
Continue Reading
Related Clinical Procurement Guides

Class B vs Class N vs Class S Autoclaves
Compare EN 13060 Class B fractionated pre-vacuum, Class S intermediate, and Class N gravity displacement autoclaves across hollow lumen penetration, Bowie-Dick testing, and 5-year clinic TCO.

Disposable vs Reusable Surgical Instruments
Analyze the 5-year Total Cost of Ownership (TCO), CSSD reprocessing labor, surgical site infection (SSI) risk, and hybrid kit strategies for disposable vs reusable surgical instruments.

Medical Consumables Bulk Procurement Guide
Step-by-step hospital supply chain blueprint: apply the ABC-VEN inventory matrix, FEFO lot tracking, par-level automation, and vendor consolidation to cut clinical consumables and workwear costs by 25%.